Saturday, May 22, 2010
Using The Gimp for Astrophotography (Part 2)
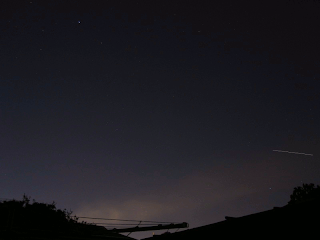 The ISS passes through the dawn sky
In the last installment I went through how to use The GIMP (sorry John) to produce astronomical overlays so you can use multiple images to enhance your sky pictures. In this installment I’m going to show you how to do animations. When making our overlays, we found that the sky moved in between each image, which was quite annoying when trying to align images. However, we can use this to our advantage and make animations of astronomical objects.
There are two basic types of animations, animations of scenes taken directly through a digital camera of some type (the Moon setting, the International Space Station going past, eclipses warning, all BIG files) or images taken through a telescope (eclipses again, occultations, more Moon stuff, Jupiters’ Moons, Saturns’ Moons). But they all have roughly the same approach.
The first step is always the setup. For taking images of Moon set or the ISS etc. you will need your camera set up on a tripod or support of some sort and make sure that the desired object will be in the field of view. For satellite shots this can be tricky, as there is often no bright object that will turn up in the view finder. I scrunch down with my eyes level to the camera, at the same angle that the camera is to the ground, and check to see if its approximately pointed, then do some test exposures to make sure things are in the right place. Once you are set up, take some exposures. I usually have the camera set to take exposures after a 2 second delay to avoid camera shake. That and the delay in saving the image to the camera is enough to get good sequential images of the ISS or iridium flares as the trace across the sky. You may want to have longer (but measured) intervals between successive exposures for moon set for example.
For “through telescope” images, I either use my modified webcam or a camera adapter attached to the lens. For images of Jupiter’s Moons, or the animation I made of Vesta, I shot an image every 15 minutes. How many images you shoot depends on a number of factors (how smooth you want the animation, how long the object will be visible, how much hard disk space you have.
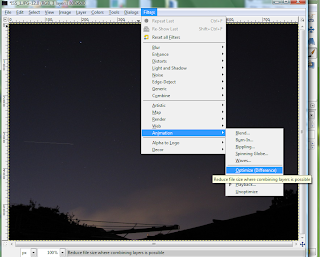 Optimizing your animation stack
Once you have your images, you can now open them in the GIMP. If you have substantial hot pixel issues, you have to subtract the dark frames as explained in then last issue. Also, for an animation, you will need to resize you images. 4000x3000 pixel images that result from 12 megapixels cameras take up a lot of territory, and will be very unwieldy. I rescale mine to 800x600 individually.
Having done that close all your images except the first image in the sequence (or re-open it if it was closed). This is your base image. Now open each subsequent image as a layer as described previously. You don’t need to do any fancy aligning if you tripod is steady, everything will be aligned properly.
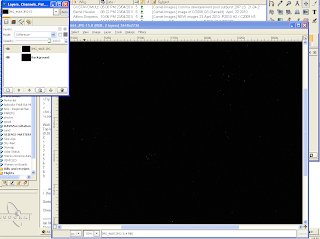 I do need to align my telescopic images, as my 4” scope is completely unguided, and I have to continually recenter the image. With the 8” scope, I’m rubbish at polar alignment, so it drifts a bit and I need to align the images too. So use the same procedure as for aligning images (using the difference feature) as in the previous installment, but once aligned set the images to normal (not addition).
Now you have your stacked images the next bit is easy. Choose Filters | Animation | Optimise. You have choice of standard optimise, and optimise for GIF.
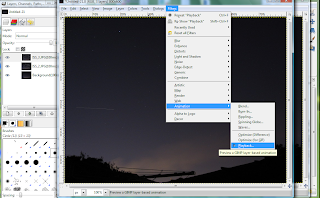 Use the latter if you want to make an animated GIF, the former if you are making an AVI. One optimised, use the Filters | Animation | Playback to see what your animation looks like. You may decide to crop the image at this stage to make the animated object more prominent (and also make the files smaller all those files above are around 1.8 Mb).
Once you are happy, now all you have to do is save. To save as an animated GIF, type a GIF extension to the file, then choose save as animated gif option in the save dialog and viola! you are done. For saving as an AVI, in GIMP 2.6 do the same thing as for the GIF (ie type an AVI as the file extension. If you have GIMP 2.2 or 2.4 you will need a plugin to allow you to save as an AVI.
And you are done! Now enjoy your animation!
Labels: astrophotography


 Click to read about or order
 Click to read about or order
 Click to read about or order
 Click to read about or order


